 |
|
|
Step - by - Step How to MAX II Super Quiet Exhaust installation This is another
addition to our new how to series, we will ba adding more every week,
so check back often. You may also e-mail suggestions for future how -
to's to. richard@route6x6.com
MAX
II Super Quiet Exhaust
Fits
all MAXII's with 14-18hp Vanguard engines |
|
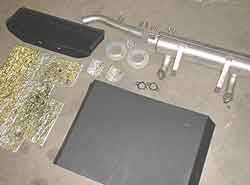 |
Kit comes with all
parts necessary for a complete installation, not shown but included
is clip for choke cable and filler plastic piece for original exhaust
hole
Click on photos for a larger view |
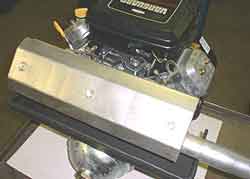 |
Muffler
and lower heat shield installed on bench test engine. Make sure you
install the new head to mainfoid gaskets, which are supplied with kit. |
 |
|
 |
Top
heat shield is being held to show general idea of heat flow, note this
top shield mounts to inside of upper body, shown later in this photo
set Click on photos for a larger view |
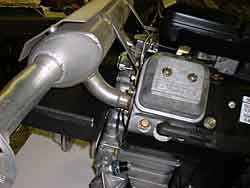 |
Muffler
attachment points to engine using supplied bolts and gaskets. Note: additonal heat shield which is preinstalled on muffler. |
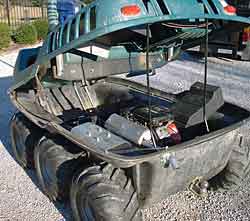 |
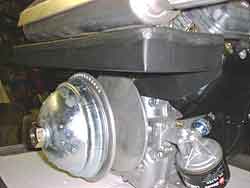
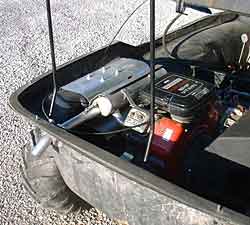
General layout Thsi machine has the optional cool intake system, only needed
in hot climate areas.
Click on photos
for a larger view |
 |
General layout, note you reuse lower body original heat shield (over left rear tire). |
 |
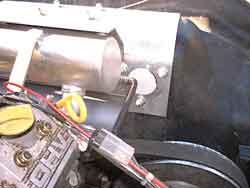
Detail
showing spring exhaust pipe and rear body flange, note clip for choke
cable. Note: Hoop to hold upper body is cut down to clear cool air kit, not necessary to cut hoop for installation of our SUPER QUIET MUFFLER KIT |
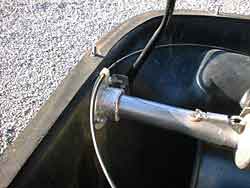 |
Detail of rear body outlet flange, note: insulation material and choke cable clip position. Note: Special spring loaded tail pipe |
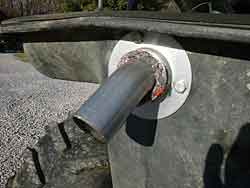 |
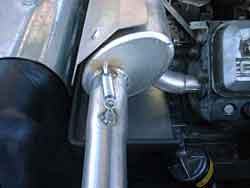
Outside
of exhaust flange, note: insulation material wraps around tail pipe One three bolt plate on outside of body, one on inside Drill 2" hole in body for tail pipe, tuen tail pipe sightly outward. |
 |
Original
outlet hole covered with white plastic piece, supplied with kit. remove
the three bolts, slid plastic filler panal in and reinstall the three
bolts. |
 |
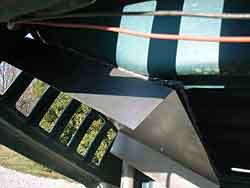
Detail installation photo: note how lower heat shield directs hot air and heat upwards. This is getting heat out of the ATV
Note: Make sure you install ALL heat shields provided with the kit. |
 |
Detail
of lower heat shield and spring exhaust pipe. Better shot of trim on lower
heat shield. Note:Installed l black trim around lower heat shield. |
 |
Installation
of upper heat shield, deflector, note: insuslation between shield and
lower side of upper body (shield is supplied painted black ). |
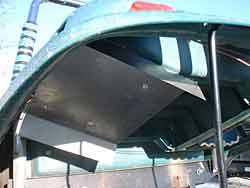 |
Another
shot of upper heat shield (shield is supplied painted black ). Everything supplied in one ready to install kit. |
If
you have any questions, you welcome to contact us at richard@route6x6.com This kit and all other MAX parts available at RICHARD'S RELICS ATV Engine parts page |
|
|
|
| Home | About This Site | New Toys | Information Bank | What's New | Blast From The Past | Museum | Tips | Photo Gallery | How To | FAQ'S | Memory Lane | Classifieds | Discussion Boards | Cartoon | Events | Shoppe | Parts for ATV's | Owner Registry | Links Webmaster: For questions or comments
|
|
