 |
|
|
Step - by - Step How to MAX 2 CHAIN ADJUSTERS
Max II machines since 1971 have been plagued by poor
chain adjusters, they are of a good idea, ratchet sliders which move
up and down with just a tap. However in the real world they slip to
allow chains to get very loose which in turn but undue stress on the
axle bearings, premature wear on the sprockets and allows the chain
to rub holes in the lower body, these chain adjusters are the single
bigest problem with the MAX II machine. Many people have lost interest
in their MAX due to this single item.
The steps below is our answer to this problem, will fit all MAX II's since 1971 |
|
This
is another addition to our new how to series, we will ba adding more
every week, so check back often. You may also e-mail suggestions for
future how - to's to. richard@route6x6.com
|
|
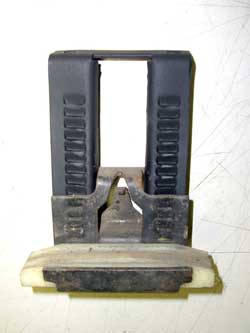 |
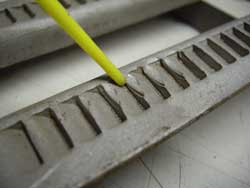
Original MAX II chain adjuster removed from frame for purposes of showing
problem areas.
To show you the problem points we sandblasted the
Click on PHOTOS to see larger view
|
 |
|
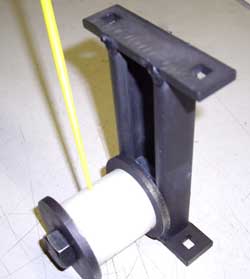 |
Note heavy steel construction. The nylon roller moves
up and down the entire height of adjuster unit. The round white nylon
roller is locked down in any vertical position by tightening the one
bolt, only requires one wrench or socket to adjust, do not have to remove
bolt to adjust just loosen and move roller assembly up and down. This is the first LIFETIME GUARANTEEon a 6x6 ATV |
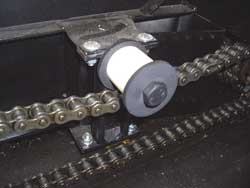 |
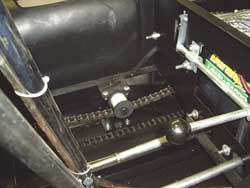
Installation is very simple, Photos showns our adjuster
installed in a MAX 2 ATV.
|
 |
A
finsihed photo of the right front adjuster installed in a MAX II Click on PHOTOS to see larger view |
If you have any
questions, you welcome to contact us at richard@route6x6.com Replacement parts
available at RICHARD'S RELICS
ATV Chassis parts page |
|
| Home | About This Site | New Toys | Information Bank | What's New | Blast From The Past | Museum | Tips | Photo Gallery | How To | FAQ'S | Memory Lane | Classifieds | Discussion Boards | Cartoon | Events | Shoppe | Parts for ATV's | Owner Registry | Links Webmaster: For questions or comments
|
|
